Yummy, soft cake buttermilk doughnut holes or counter top baker Doughnuts!
I have been using the following recipe–It’s a modification of the Betty Crocker Donut holes recipe from the old BC cookbook.
I have made it both as a baked doughnut in my Nostalgic Baker that my son got me for Christmas and as deep fried doughnut holes.
1 C Better Batter AP GF Flour
1/2 tsp baking powder
1/2 tsp baking soda
1/4 tsp fine kosher sea salt
1/4 tsp nutmeg (ground–I use fresh grated in mine)
1/4 C sugar
–Mix all the dry ingredients in a bowl with a whisk
Then add
1 large egg
1 tsp vanilla
2 TB canola oil
1/2 C plus up to 2 TB Buttermilk (more is used when making baked)
Mix until smooth.
Heat oil to 350 degrees use a 1 TB cookie scoop to drop doughnut holes in to oil–cook until golden brown. Mine will actually roll over by themselves. They usually are done in about 3 minutes (give or take) use a metal slotted spoon or a spyder to lift out the cooked doughnuts and drain on paper towel. These are yummy rolled in powder sugar or cinnamon sugar or dipped in a vanilla glaze.
Or Baked–in oven 350 degrees (follow directions that came with your doughnut pan)
Counter top baker–follow directions that came with your baker.
My family LOVES these doughnuts any way that I cook them. Cheers!
Making food is creative right??
Showing posts with label homemade. Show all posts
Tuesday, March 6, 2012
Tuesday, August 23, 2011
Cooking up a storm!
Just a quick post as I'm having so much fun cooking new things and not getting much else done. I love finding new recipes and trying them out and I have been in a cooking mood. Weird...right? It's the hottest part of the Summer and here I am, coming home from work and baking!
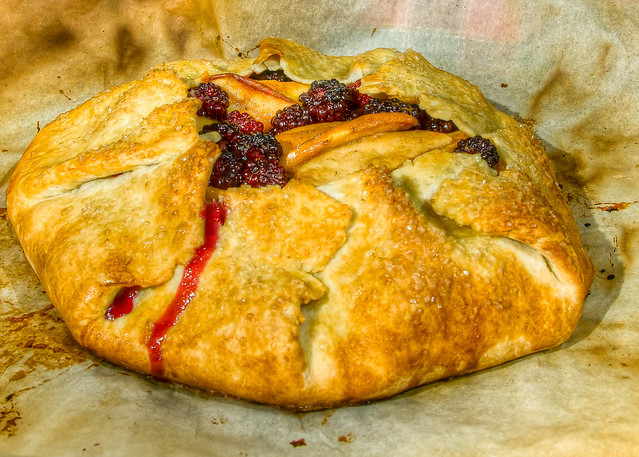
First I made a lovely Rustic Apple Blackberry pie. I cooked it up on the grill and didn't even burn it!! I got the gluten free crust recipe from Gluten Free on a Shoestring Nichol is a charming lady with a very creative and clever way of writing, she also has AWESOME gluten free recipes.
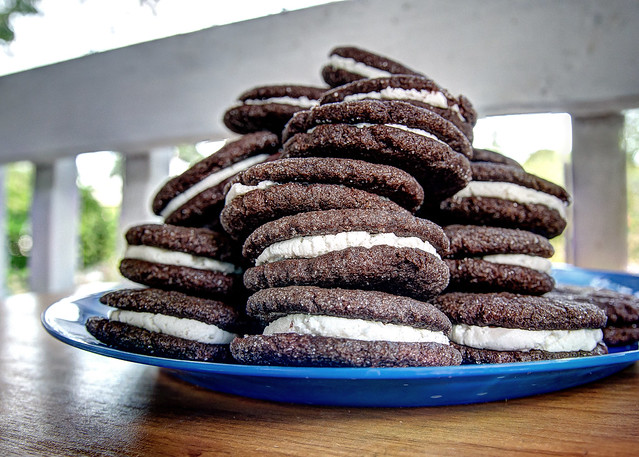
Next I came across a recipe on Smitten Kitchen for Homemade Oreo cookies. Chocolaty, creamy, crunchy dunkable Oreo Cookies! I followed her recipe exactly EXCEPT I used Better Batter Gluten Free All Purpose flour. It worked really well.
All of the photo credit goes to my awesome hubby Mark, he's also my chief taste tester, um...guinea pig, foody victim and general good guy with a cast iron tummy!
I am off to figure out what I'm going to do tonight...sweet or savory? It's so hard to decide!
Remember to get out and do something creative today!
hugs,
Stephanie
First I made a lovely Rustic Apple Blackberry pie. I cooked it up on the grill and didn't even burn it!! I got the gluten free crust recipe from Gluten Free on a Shoestring Nichol is a charming lady with a very creative and clever way of writing, she also has AWESOME gluten free recipes.
Next I came across a recipe on Smitten Kitchen for Homemade Oreo cookies. Chocolaty, creamy, crunchy dunkable Oreo Cookies! I followed her recipe exactly EXCEPT I used Better Batter Gluten Free All Purpose flour. It worked really well.
All of the photo credit goes to my awesome hubby Mark, he's also my chief taste tester, um...guinea pig, foody victim and general good guy with a cast iron tummy!
I am off to figure out what I'm going to do tonight...sweet or savory? It's so hard to decide!
Remember to get out and do something creative today!
hugs,
Stephanie
Thursday, July 14, 2011
Oh My Bagels--Gluten free?
Have you ever thought of making your own gluten free bagels? I always thought that bagels would be hard to make, that gluten free dough couldn’t be boiled and hold together and that it would just be a mess. Boy! Was I ever wrong.
Making bagels with the recipe that I came up with (after looking at several wheat flour bagel recipes) is so easy! It does take time but most if it is overnight when you are sleeping already any way.
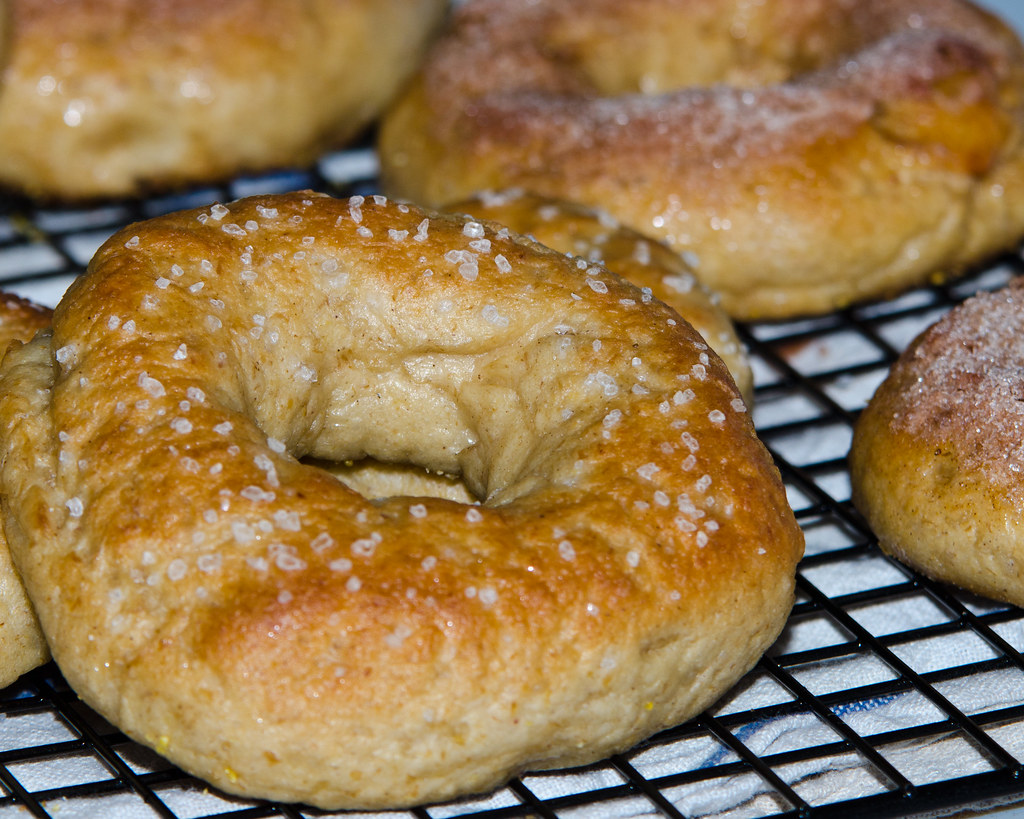
These have a lovely crust that is slightly glossy and chewy. There are several different whole grain flours but they add so much to the end flavor and nutrition. These are wonderful after cooling right out of the oven without toasting. The same day they can still be eaten with out toasting after the first day you will want to pre-slice, wrap and freeze to keep that just baked freshness. Just pull out of the freezer, toast and enjoy!
If you make these bagels remember that playing with gluten free dough is always a time of experimenting. Get to know the texture, this dough is soft but with a bit of cornstarch you can handle the dough, rolling into smooth balls and shaping gently.
Remember as with all recipes to read all the directions first before making the recipe. This has several steps, they are all easy but are necessary to end up with a good product at the end!
Multi Grain Gluten Free Bagels
(c)2011 Stephanie Bergeron
*Recipe yields 9 bagels
Bagel Ingredients:
½ c potato starch
3/4 c tapioca starch
½ c Millet flour
½ c Sweet sorghum flour
½ c GF Oats (pulse in blender or food processor to make flour measure out ½ c)
½ c Brown rice flour
2 T golden flax seed meal
1 t unflavored gelatin
2 T brown sugar
1 t kosher salt
2 ½ t xanthan gum
1 T yeast
1 ½ c warm water
Mix all the dry ingredients in mixer bowl, slowly add the water to make a firm but soft dough. Mix for 5 minutes to develop the xanthan gum and gelatin structure. (I'm using a Kitchen Aid Mixer with a fairly strong motor--you can mix by hand if you don't have a mixer--it will build muscles and character)
Turn out the dough on parchment dusted with cornstarch (or starch of your choice) roll the dough around to lightly cover with starch and make it easier to handle.
Cut 9 even pieces. Roll each piece into a ball. Punch your thumb through the center of the ball and lightly stretch to open the ring of dough.
Place on a baking pan that has a silicon mat or parchment lightly sprayed with non-stick spray.
Make the rest of the balls into rings and place on pan. Lightly spray the bagel rings with cooking spray and cover with plastic wrap.
Let the pan rest on the counter for 30 minutes then put into the refrigerator over night.
Next morning, take pan out and let the bagels come to room temp.
They will have developed a better flavor in the overnight rest and rise. (Remember that these are gluten free and they won’t double in size during the overnight rise—this is just the way it is.)
The next morning, or after at least 8 hours in the refrigerator.
Turn on the oven and start preheating to 500 degrees F (if you have a baking stone make sure it is in the cold oven first and that it gets heated during the pre heating time).
Take a large cooking pot and fill it with fresh water. Add 3 tablespoons of brown sugar to the water and bring to a boil.
Using a large slotted spoon or slotted spatula carefully place 3-4 bagels into the boiling water.
Boil for 2 minutes and flip to boil an additional 2 minutes.
Using a large slotted spoon or slotted spatula - remove to a cooling rack over a towel to catch any dripping water.
If you plan to sprinkle with seeds, cinnamon sugar or coarse salt, do it while they are still wet from boiling.
Then boil up the rest of the bagels following the same directions from above.
Move all the boiled bagels to a baking pan covered with parchment or a silicon mat lightly sprayed with cooking spray and sprinkled with fine corn meal.
15 minutes total baking time- 5 minutes in oven preheated to 500 degrees F, then reduce temp to 425 degrees F for 5 minutes, then 5 minutes on the baking stone or flipped over on pan to crisp the bottoms.
The bagels should be a light golden brown and have a slightly shiny look to them when they are done.
Now the hardest part—you have to wait at least 30 minutes to let them cool before cutting. If you don’t wait you will end up with a less than satisfactory experience. Just trust me and wait.
Now cut open and spread with your choice of spreads and enjoy!
If there are any leftovers that are completely cold you can pre slice them, wrap and freeze, ready to be taken out, toasted and munched at a later date.
Making bagels with the recipe that I came up with (after looking at several wheat flour bagel recipes) is so easy! It does take time but most if it is overnight when you are sleeping already any way.
These have a lovely crust that is slightly glossy and chewy. There are several different whole grain flours but they add so much to the end flavor and nutrition. These are wonderful after cooling right out of the oven without toasting. The same day they can still be eaten with out toasting after the first day you will want to pre-slice, wrap and freeze to keep that just baked freshness. Just pull out of the freezer, toast and enjoy!
If you make these bagels remember that playing with gluten free dough is always a time of experimenting. Get to know the texture, this dough is soft but with a bit of cornstarch you can handle the dough, rolling into smooth balls and shaping gently.
Remember as with all recipes to read all the directions first before making the recipe. This has several steps, they are all easy but are necessary to end up with a good product at the end!
Multi Grain Gluten Free Bagels
(c)2011 Stephanie Bergeron
*Recipe yields 9 bagels
Bagel Ingredients:
½ c potato starch
3/4 c tapioca starch
½ c Millet flour
½ c Sweet sorghum flour
½ c GF Oats (pulse in blender or food processor to make flour measure out ½ c)
½ c Brown rice flour
2 T golden flax seed meal
1 t unflavored gelatin
2 T brown sugar
1 t kosher salt
2 ½ t xanthan gum
1 T yeast
1 ½ c warm water
Mix all the dry ingredients in mixer bowl, slowly add the water to make a firm but soft dough. Mix for 5 minutes to develop the xanthan gum and gelatin structure. (I'm using a Kitchen Aid Mixer with a fairly strong motor--you can mix by hand if you don't have a mixer--it will build muscles and character)
Turn out the dough on parchment dusted with cornstarch (or starch of your choice) roll the dough around to lightly cover with starch and make it easier to handle.
Cut 9 even pieces. Roll each piece into a ball. Punch your thumb through the center of the ball and lightly stretch to open the ring of dough.
Place on a baking pan that has a silicon mat or parchment lightly sprayed with non-stick spray.
Make the rest of the balls into rings and place on pan. Lightly spray the bagel rings with cooking spray and cover with plastic wrap.
Let the pan rest on the counter for 30 minutes then put into the refrigerator over night.
Next morning, take pan out and let the bagels come to room temp.
They will have developed a better flavor in the overnight rest and rise. (Remember that these are gluten free and they won’t double in size during the overnight rise—this is just the way it is.)
The next morning, or after at least 8 hours in the refrigerator.
Turn on the oven and start preheating to 500 degrees F (if you have a baking stone make sure it is in the cold oven first and that it gets heated during the pre heating time).
Take a large cooking pot and fill it with fresh water. Add 3 tablespoons of brown sugar to the water and bring to a boil.
Using a large slotted spoon or slotted spatula carefully place 3-4 bagels into the boiling water.
Boil for 2 minutes and flip to boil an additional 2 minutes.
Using a large slotted spoon or slotted spatula - remove to a cooling rack over a towel to catch any dripping water.
If you plan to sprinkle with seeds, cinnamon sugar or coarse salt, do it while they are still wet from boiling.
Then boil up the rest of the bagels following the same directions from above.
Move all the boiled bagels to a baking pan covered with parchment or a silicon mat lightly sprayed with cooking spray and sprinkled with fine corn meal.
15 minutes total baking time- 5 minutes in oven preheated to 500 degrees F, then reduce temp to 425 degrees F for 5 minutes, then 5 minutes on the baking stone or flipped over on pan to crisp the bottoms.
The bagels should be a light golden brown and have a slightly shiny look to them when they are done.
Now the hardest part—you have to wait at least 30 minutes to let them cool before cutting. If you don’t wait you will end up with a less than satisfactory experience. Just trust me and wait.
Now cut open and spread with your choice of spreads and enjoy!
If there are any leftovers that are completely cold you can pre slice them, wrap and freeze, ready to be taken out, toasted and munched at a later date.
Labels:EDM Challenge
bagels,
baking,
gluten free,
homemade,
recipe
Subscribe to:
Posts (Atom)